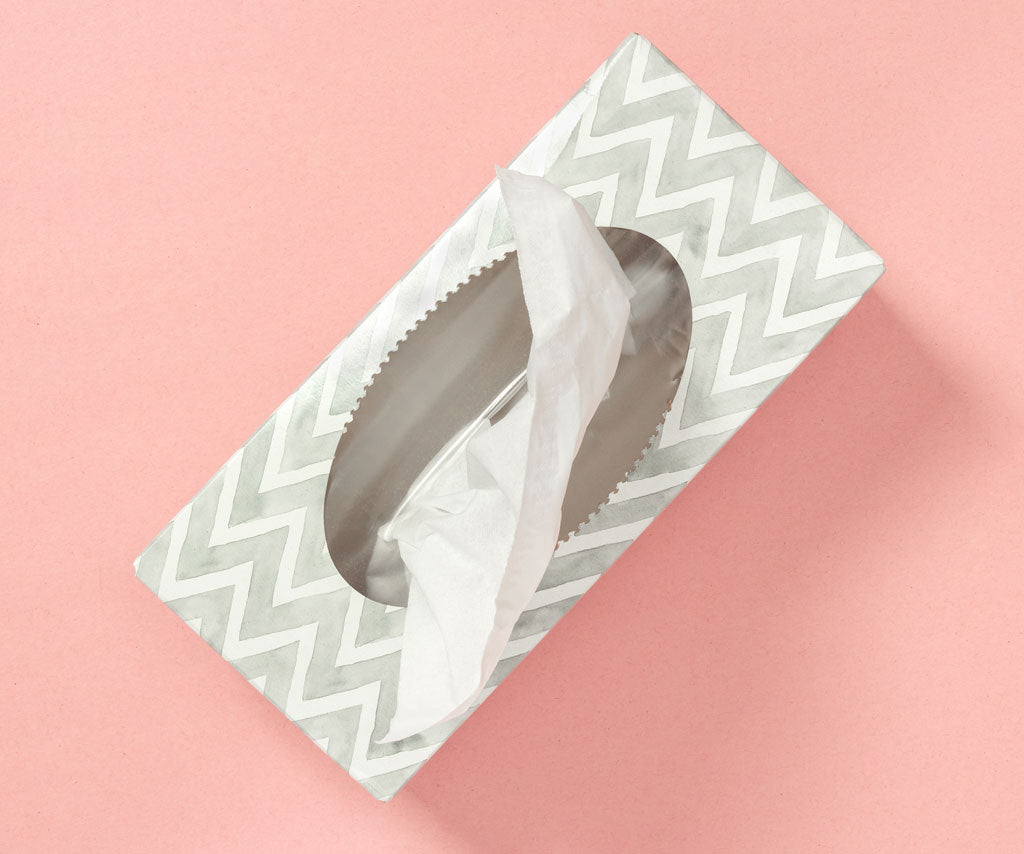
The past few years sustainability has been on the top of everyone's mind, which means there is no better time to turn your unwanted items—like tissue boxes—into fun DIY projects. Before you throw out that tissue box, here are a few ways to reuse it!

1. Make a Faux Succulent Planter
If you are anything like me, you have a hard time keeping succulents alive. No matter what I do, I fail at keeping them alive. House plants aren’t that easy to take care of—especially if you're just starting out. This project is perfect for the other plant killers out there!
Supplies:
• Empty tissue box
• Rope (preferably thicker)
• Hot glue gun
• Floral foam
• Faux succulents
• Scissors
• Exacto knife (optional)
Directions:
1. First, cut off the top of the tissue box.
2. Next, cut the floral foam to fit inside the tissue box.
3. Then, hot glue the rope around the outside of the box.
Tip: The larger the rope the easier it is to glue it.
4. Finally, insert the floral foam and arrange the succulents as you like. That’s it!

2. Make a Train
ALL ABOARD! Get everyone together because it is time to create our own DIY train cars. Have fun designing and decorating your train. Follow these easy instructions and you’ll end up with some really neat train cars.
Supplies:
• 1 long tissue box
• 1 or more small tissue boxes
• Empty Toilet Paper Roll
• Paper (or paint)
• Cardboard
• Glue or tape
• Rope or string
• Scissors
• Exacto knife (optional)
• Marker
• Decorations of your choice (pom poms, shoelaces, glitter, pipe cleaners, feathers, stickers, etc…)
Directions:
1. First, wrap all the boxes completely with the paper of your choice.
2. Next, we are going to attach the rope to all the tissue boxes. For the long tissue box, cut a small hole in the back middle of the box. Thread the rope through and tie a small knot. Add tape for extra security. Then, add holes to both sides of the other tissue boxes except for the caboose which will only need one hole. Thread the rope through and tie a knot. Add tape for extra security. The knot will allow the train cars to stay the same width apart at all times.
3. Next, wrap the toilet paper roll with paper. Hot glue it to the front train car.
4. Continue to decorate the rest of the train cars as you like.
5. Choo choo...ALL ABOARD! Enjoy your new train set!

3. Become a Shoe Designer
This is a great creative project for the whole family. For this activity, you can have a competition for who designs the coolest shoes. You can have a theme or let everyone create one without boundaries. Our kids chose to design monster shoes.
When designing, you can get as creative as you want. A few ideas for decorating are to paint them, wrap in construction paper, tissue paper, felt or a mix of all these materials. You can then add on extra decorations to make your shoes really stand out!
Supplies:
• Tissue boxes
• Paper (construction, felt, tissue)
• Paint and paint brushes
• Tape, glue or hot glue gun
• Decorations (pom poms, shoelaces, glitter, pipe cleaners, feathers, stickers, etc…)
• Hole punch
• Scissors
Directions:
1. Cover the box with paper or paint.
2. Add decorations to your liking.
3. Optional: Hole punch 3 holes on each side to add in shoelaces.
4. Vote for your favorite shoes!

4. Hanging Lanterns
Lanterns are one of my new favorite decorations. I have recently added them to my patio area in my backyard—the aesthetic is in trend right now. This is a fun cheap DIY project to add some new decorations around the house.
Supplies:
• Tissue box
• Empty toilet paper roll
• Tissue paper
• Ruler
• Pencil
• Paint
• Paintbrush
• Yarn
• Hot glue gun
• Tape
• Scissors
• Exacto knife
• DIY pom pom maker
Directions:
1. First, disassemble the tissue box.
2. Next, take off the plastic covering from the tissue box.
3. Use a ruler and pencil to cut out the windows for your lantern. In the square next to the oval flap, draw a rectangle with a ½” border away from the folds on the front and back panels (not the bottom or top of the tissue box). Cut out the rectangle.
4. Then, paint the plain cardboard side of the tissue box.
5. After the paint dries, add tissue paper in the inside of the open rectangle. You can tape the tissue paper to the box.
6. Next, hot glue the box back together.
7. Cut three pieces of 12" yarn. You are going to add the yarn to the oval top. Tape one end of the yarn on the inside corner of the box. With the same piece of yarn, tape it to the opposite corner. Repeat this step with the other piece of yarn. Use the third piece of yarn and tie it around the place where the other two yarns meet.
8. For this optional step, you can add pom poms. I used this tutorial for a DIY pom pom maker. These pom poms turned out ADORABLE! I highly suggest making these.
9. Place a battery operated tea light in the lantern.

5. Make a Musical Instrument
Get your groove on with a fun guitar using a tissue box and cardboard paper towel roll! For this activity, you have the option of making a guitar or see who can invent the coolest instrument.
Supplies:
• Tissue Box
• Empty Paper Towel Roll
• Paper (or paint)
• Rubberbands
• Glue or tape
• String
• Scissors
• Marker
• Decorations of your choice (pom poms, shoelaces, glitter, pipe cleaners, feathers, stickers, etc…)
Directions:
1. Cover the box with paper or paint.
2. Trace the empty paper towel roll at the top of the tissue box.
3. Cut a hole where the circle is.
4. Cover the paper towel roll with paper or paint.
5. Add as many rubber bands lengthwise as you want.

6. Make a Rocketship
3...2...1… Prepare for liftoff! This DIY craft is a creative project for the kids. They will use their imagination to design their own rocket ships by stacking the tissue boxes together and then have fun with the finished masterpiece.
Supplies:
• 9 Tissue Boxes
• Empty Liter of Soda
• Colored paper or tissue paper
• Paint
• Paintbrush
• Tape
• Hot Glue Gun
• Scissors
Directions:
1. First, stack and tape all the tissue boxes on top of each other.
2. Next, cut off the end of a 2 liter of Soda (for the top shape of the rocket).
3. Tape and use the hot glue gun to the top of the tissue boxes.
4. Lastly, paint and decorate the rocketship and wait to dry.
 7. A Few Other Ideas
There are so many ways to upcycle tissue boxes! We wanted to share a few other ideas we had.
• Car wash
• Bird Feeder
• Castle
• Wash Cloth Towel Holder
For these ideas, you can take charge with your creativity. There are so many ways to design these. We would love to see how your creations turn out. Please tag @zokuhq on instagram to show us how your crafts turned out. We can't wait to see them!

Share: