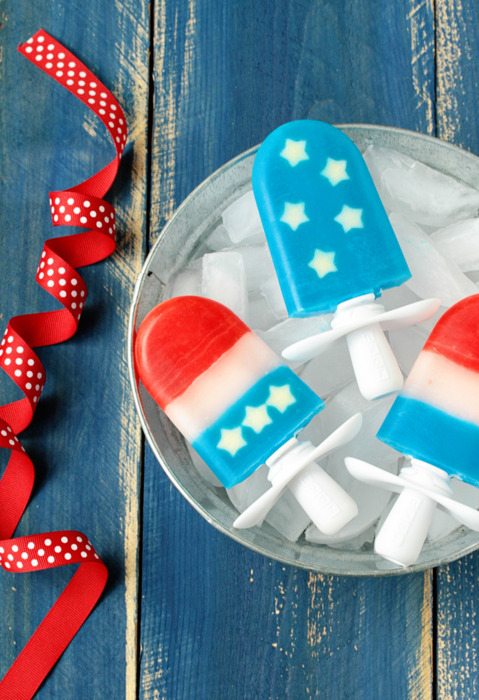
These American flag inspired Quick Pops are not only festive, but they are also incredibly simple.
Makes 3-6 Pops
INGREDIENTS
12 oz of lemonade
Red food coloring
Blue food coloring
1 apple or pear for creating the stars
CREATING THE COLORS
Use liquid or gel food coloring to dye lemonade red and blue; plain lemonade will create the white layer. If you are using gel dyes, be sure to throughly stir your dyed lemonade to ensure that all of the dye has been dissolved into the liquid.
CUTTING AND APPLYING THE STARS
- Slice an apple or pear 1/8 inch thick or less
- Lay the fruit flat and cut with the star fruit stencil found in the Zoku Tool Kit
- Attach the fruit slices using the end of the fruit wand (also found in the Zoku Tool Kit).
- Insert the prepared fruit wand into the pop mold, pressing the fruit star against the wall of the cavity for about 10 seconds. Repeat as desired.
LAYERING
- If you want to create a red, white, and blue effect, remember to pour your red lemonade in first. To achieve the look that is seen in the photo, you’ll want to use the following guidelines or you can estimate your desired proportions. Click here for tips to create neat layers.
RED, WHITE, AND BLUE QUICK POPS
- Remove your Zoku Quick Pop Maker from the freezer. Apply 3 stars to the top 1/3 of the Zoku Quick Pop cavities using the directions above.
- Insert sticks. Pour ½ ounce plain lemonade into each Zoku Quick Pop cavity. Allow this layer to freeze completely.
- Next, pour ¾ ounce of red lemonade into each cavity. Allow this layer to freeze completely.
- Finally, pour ¾ ounce of blue lemonade into each cavity, this last layer should reach the fill line. Allow this layer to freeze completely.
- Remove the pops with the Super Tool and enjoy.
NOTE
Since we are using a layered method, the amount of pops you can make per session will be reduced. This is because there is a longer freezing time due to the multiple layers.
HAVE FUN AND BE CREATIVE
We’d love to see your 4th of July Quick Pops, so be sure to upload a photo and share your creations on our
Facebook page!


Leave a comment (all fields required)